
Account owners and admins can add, remove, and change account-level permissions for people on the Account Members page.
Adding an account member
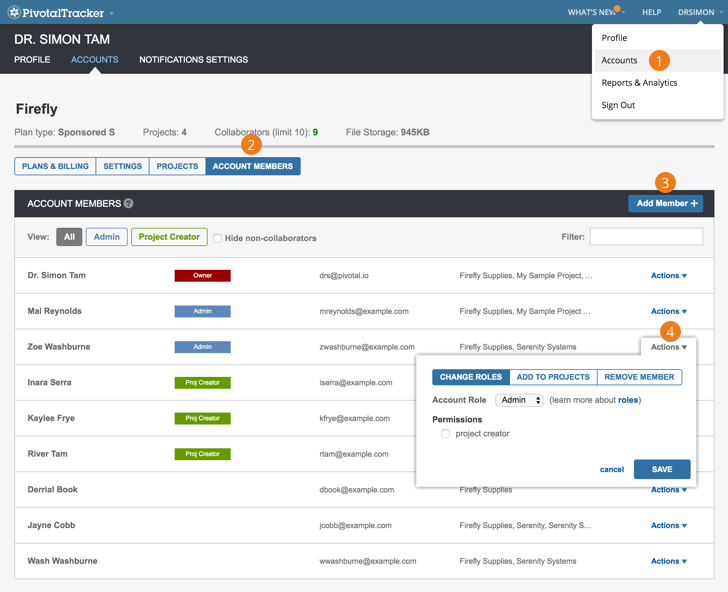
Here’s how to add an account member:
-
Click Accounts under your username at the top right of Tracker.
-
Select Manage Account for the account you wish to manage membership for, then click the Account Members tab located above the listed plans.
-
Click Add Member, enter an email address, and select the desired account role. Then click Add. If you invite people who don’t already have a Tracker login, they can click the link in their invitation email to set one up.
-
You can also add account members to one or more projects within the account, specifying whether they are a project owner, member or viewer. Click the Actions menu next to the newly added member’s name and click Add to Projects. Choose “Add to all all projects in account” or an individual project name, and the desired Project Role. Click Save. Note that any account member who has only a viewer role in projects, in other words a read-only account member, does not count towards plan collaborator limits. (Project owners can also add account members to a project, via Members in the top navigation menu.)
Removing an account member
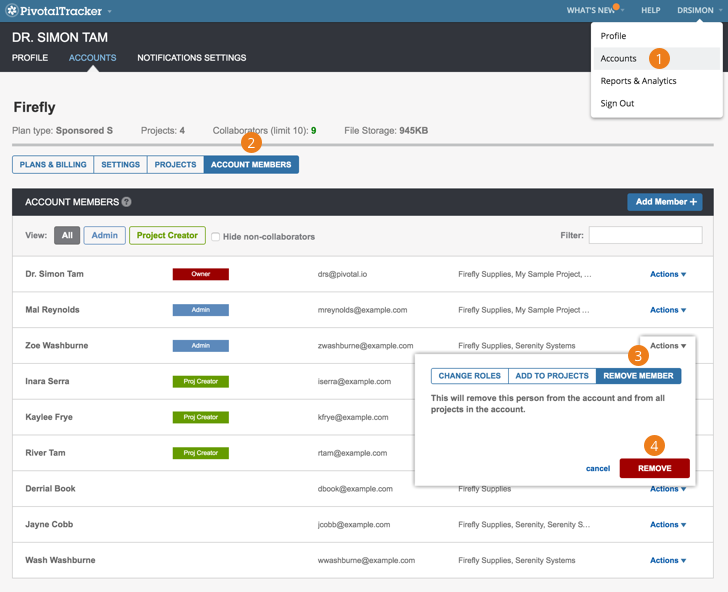
Here’s how to remove an account member:
-
Click Accounts under your username at the top right of Tracker.
-
Select Manage Account for the account you wish to manage membership for, then click the Account Members tab located above the listed plans.
-
Click Actions to the right of the appropriate member’s name and click Remove Member.
-
Click Remove (this will remove the person from the account and therefore from all projects in the account).