
Many consultancies host client projects on their own Tracker accounts. Once the engagement ends, the client may wish to have their projects moved over to a new, separate account that they own. Here are steps you can follow to create a new account for your client, transfer ownership, and finally move their projects over.
Create a new account for your client

-
Sign in to Tracker.
-
Click Accounts under your username at the top right of Tracker.
-
Select Create Account.
Transfer ownership to the client
Once you’ve created an account for your client, you can transfer ownership to them using the steps below. Afterward, it’s important that the client select a plan that will allow for all of the projects and collaborators they will need.
-
Click Accounts under your username at the top right of Tracker.
-
Select Manage Account for the client’s account.
-
Click the Account Members tab.
-
Click Add Member in the top right, enter the client’s email address, change the Account Role setting in the pop-up that opens to Owner, and click Save.
-
At this point, you will become an account admin and they will be able to choose the appropriate plan on the account’s Plans & Billing page.
Move the client’s projects to the new account
Once ownership has been transferred and the client has chosen a plan with sufficient project and collaborator limits for their needs, you can move their projects to their account by following the steps below.
-
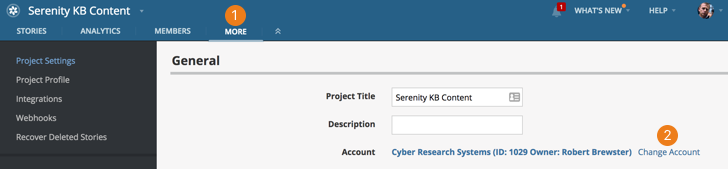
From within the project, click MORE in the top nav.
-
To the right of the Account field, click Change Account.
Then just choose the client’s account from the dropdown and click Save.