
Adding a project member
Here’s how to add a member to your project:

-
From within a project, click MEMBERS in the top navigation menu.
-
Click Invite people located in the upper right to open a form that allows you to invite one or more users.
-
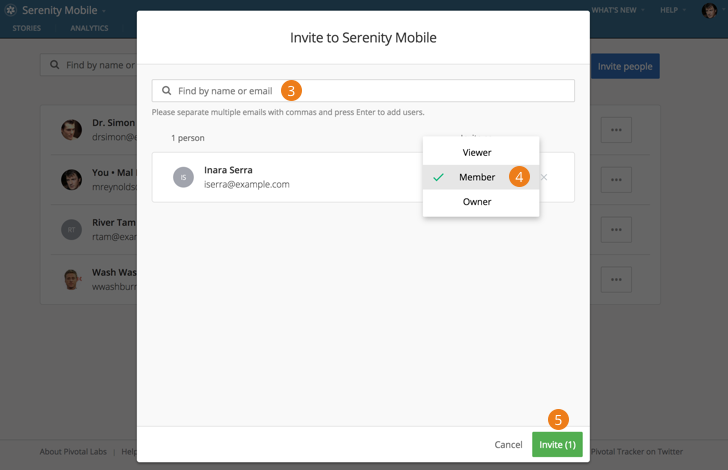
Enter in the email address of a user you’d like to invite, or invite multiple users at the same time by pasting in a comma or space separated list of email addresses. You can also invite existing account members by searching for their name, username, or email address.
-
New invites will default to the member role, however, you can also choose the viewer or owner role from the invite as drop-down to the right of the user. See Project member roles for more on the differences between project roles.
-
When ready, click the Invite button at the bottom of the form to send your invite(s).
-
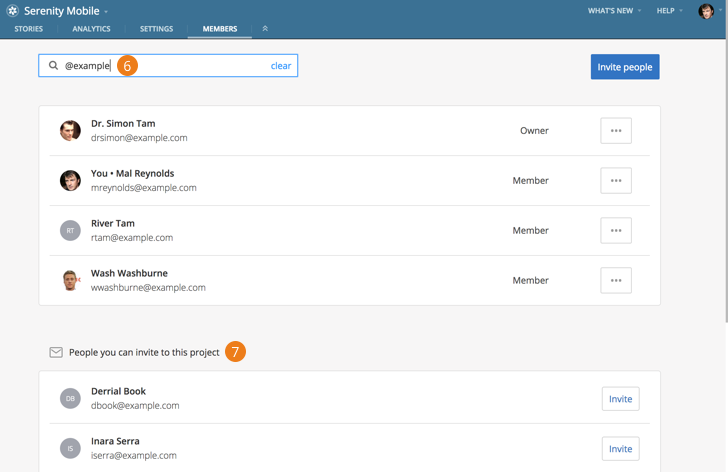
In the Find by name or email field, you can filter existing project and/or account members by name, username or email address.
-
For instance, search on your company’s email domain to produce a list of account members who’ve yet to be invited to the project. They’ll appear underneath any existing project members in the People you can invite to this project section.
- Search on the name, username or email address of an existing project member to make changes to their role or remove them from the project.
Removing a project member
Here’s how to remove a member from your project:
-
From within a project, click MEMBERS in the top navigation menu.
-
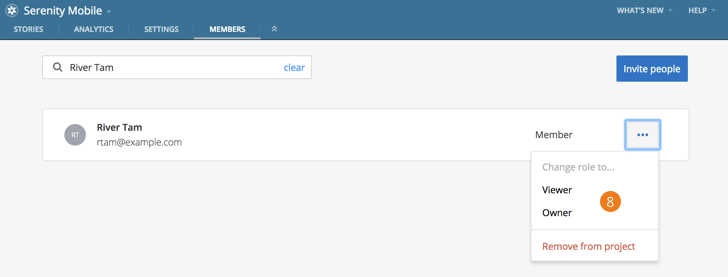
You can filter existing project members by searching for their name or email address in the Find by name or email field located at the top.
-
To the right of the appropriate member, click the member actions menu and select Remove from project from the drop-down.