
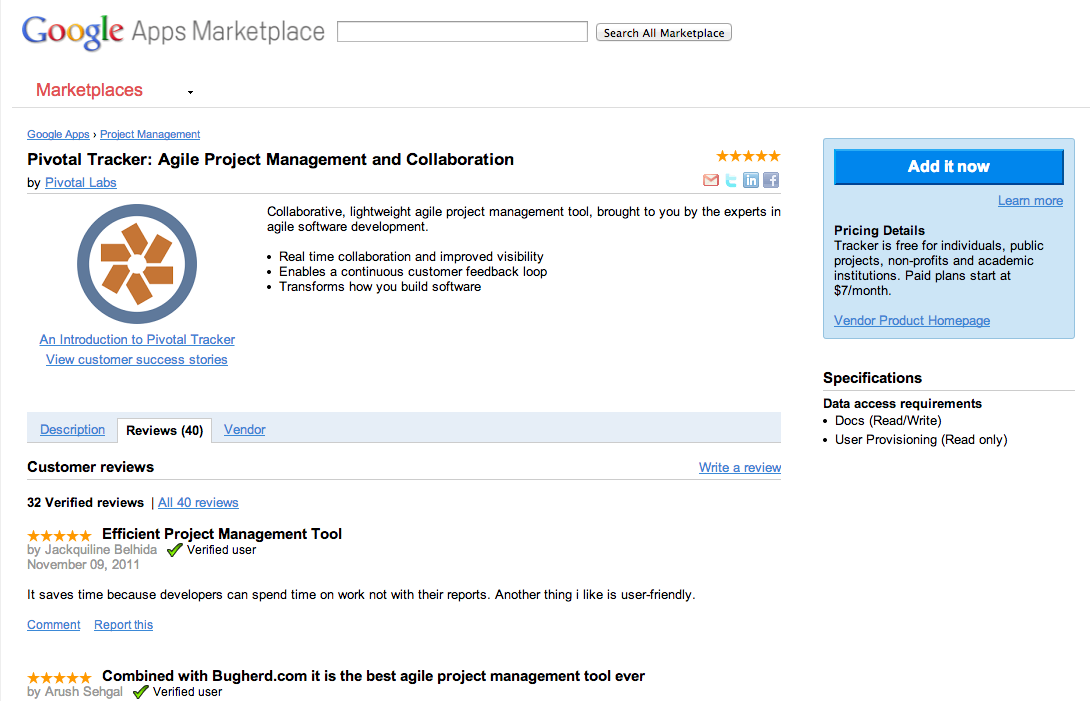
Pivotal Tracker has been in the Google Apps marketplace for a few weeks, and we’re excited to see that it’s already in the Top New Apps list! Thanks to everyone who jumped right in, and for all the great reviews!
For the most part, provisioning Tracker for a Google Apps domain is straightforward, but there are some potential gotchas, especially if you have multiple logins or accounts in Tracker, or have been signing into Tracker via OpenID, using Google Accounts. This post covers the provisioning process for existing Tracker accounts in step-by-step detail, and explains how to recover from problems.
If this is the first time you’re reading about the Tracker integration with Google Apps, adding Tracker as a marketplace app to your domain will enable single sign-on, universal navigation, integrated user management, and the ability to attach Google Docs to your Tracker stories. See my previous post for more details.
The Google Apps integration in Tracker works at the level of the Tracker account—this is different from a user login, and typically represents an organization.
In order to add Tracker to your Google Apps domain, and enable integration features for all projects in an existing Tracker account, you will need be an administrator in your Google Apps domain, or a user with the Domain Settings privilege enabled. You also need to be an owner or admin of the Tracker account that you wish to link to your Google Apps domain (typically the account that holds all of your company’s projects).
Note: If you’ve tried to integrate Tracker with Google Apps before and ran into problems, remove Tracker from your Google Apps domain and unlink any linked accounts in Tracker prior to proceeding. See the Troubleshooting section below for details on how to do that.
Below are step-by-step instructions on how to provision Tracker for your Google Apps domain and link to your company’s Tracker account/projects to it.
Use the Google Apps link on the Tracker Signin page to sign in with the correct OpenID “identity”—it’s the one on the right. Do not use the Google Account link for Google Apps, unfortunately Google treats that as a different OpenID identity, and the Google Apps provisioning or integration features will not work with it.
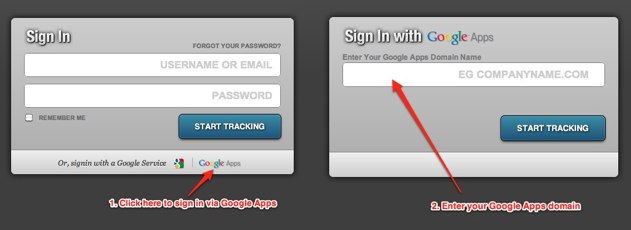
If this is the first time you’re signing in to Tracker via Google, you’ll be shown the page below, with two different forms. As an an existing user, link your Google Apps identity to your Tracker login by entering your existing Tracker username (or email address) and existing password in the form on the left.

Note: If you see any errors at this point, it may be because you already have a Tracker login and/or you’ve used a different Google OpenID identity before. See the Troubleshooting section below.
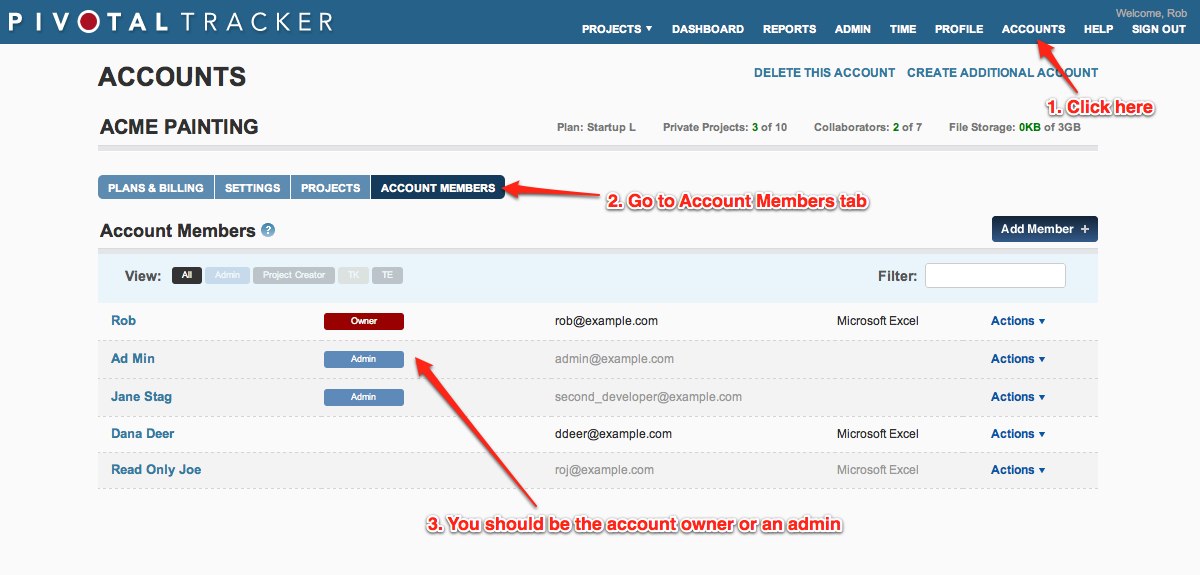
After you sign in to Tracker via Google Apps, click the ACCOUNT or ACCOUNTS link in the top of the page. You should see the account that your company’s projects are in, and be able to access that account’s Settings page. If you can’t see it, then you’re not an Owner or Admin of the account, and you will need to be added (by the owner or an existing account admin) before proceeding.
Go to the Pivotal Tracker listing in the marketplace and click Add it now. You’ll be asked to accept the Google Apps terms of service, and confirm that you’d like to allow Tracker to access Docs and User Provisioning data in your domain. The last step will prompt you to configure the application—click the configure button.
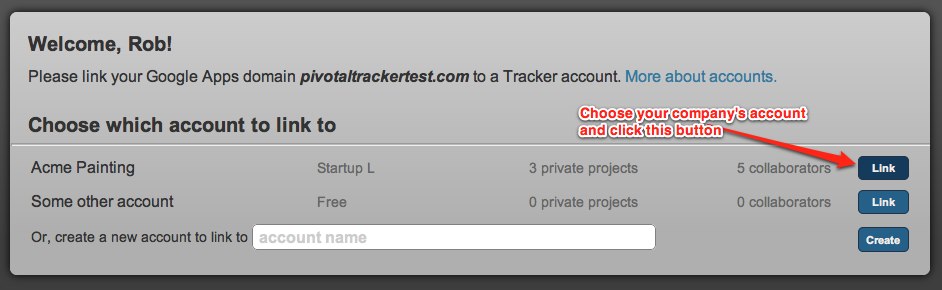
You should see the account from step 2 here. Click the link button next to it to associate it with your Google Apps domain. You’ll be taken back to Google, and at this point you’re done with the actual provisioning and linking.
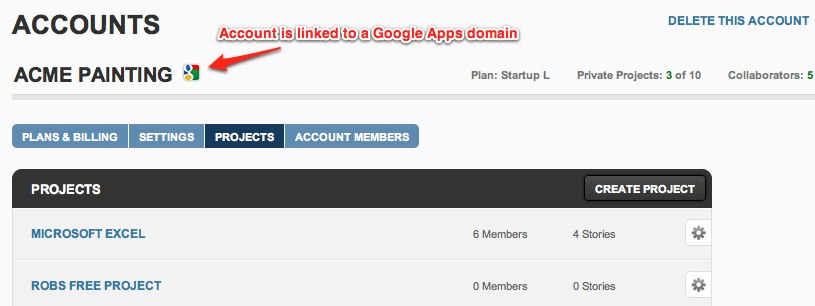
Tracker should now be provisioned for your Google Apps domain, and the account you chose in the previous step should be linked to the domain. To verify, make sure that the account details page (click on ACCOUNT(S) at the top of the page in Tracker) shows a Google icon next to it’s name. If you hover over it, you should see your Google Apps domain name.
At this point, all users in your domain should see Pivotal Tracker in the Google “More” menu. On the Tracker side, you should be able to bulk-add users from your domain to this Tracker account and/or all projects in the account, as well as attach Google Docs to stories in those projects (see previous post for more details about these features).
If you don’t see the Google link next to the account name, the provisioning process did not complete properly—see below for some suggestions. Feel free to give us a shout by email and we’ll help you get everything working.
This could be either because your projects are not in the Tracker account that you’ve linked to Google Apps, or the account linking part of the provisioning process (Step 4 above) did not complete. Remove Tracker from your Google Apps domain (see below), and follow ALL of the steps above again.
It’s possible that they are working in a project that’s in a different account than what you’ve linked to Google Apps—go to project settings in those projects to see what account they are in. The other reason they don’t see the features might be that they have not yet (correctly) associated their own Google Apps domain identity with their Pivotal Tracker login. Each person has to do this for themselves, as they’re the only ones who have the login credentials for both systems. If they are using a Google Account identity (instead of Google Apps), they will need to un-associate that from their Tracker login, and associate their Google Apps identities—see this FAQ entry for how to do that.
Go to the Google Apps Dashboard for your domain—if you can’t find it via Google’s navigation menus, the URL is usually this format:
https://www.google.com/a/cpanel/yourdomain.com/Dashboard
All installed apps are in the Google Apps Marketplace section, near the bottom of the page. Find the Pivotal Tracker entry, and click the Delete Pivotal Tracker link on the details page. This does not delete data in Tracker, it only removes it from Google’s navigation and revokes data access permissions.
You will also need to “unlink” the integration from the Tracker side. Go to the Settings page of the account that was linked to Google Apps (by clicking on the ACCOUNT or ACCOUNTS link at the top of the page in Tracker, then the SETTINGS tab), and look for “Unlink from Google Apps domain”. Again, unlinking the account does not delete any data, and you can link the account to Google Apps again at any time by following the steps above.
If you see an error message about duplicate OpenID emails, it means that you’ve been to Tracker before, but signed in with a different Google “identity” (Google Accounts vs Google Apps or vice versa). If this happens, please follow the steps here.
If you see a message about your email being in use, it means that Tracker already has a login for you. If you don’t remember your Tracker password, you can use the “forgot password” link on the normal Tracker signin page. If you’ve really never used Tracker before, then you have probably been “invited” to a Tracker account or project already by a coworker. If so, you should have received an invitation email that contains an activation link. You must activate your login by following the link in the invitation email. You can then associate your login with your Google Apps domain identity during the activation process.
Category: Integrations
Tags: How to