
On its own, Pivotal Tracker is a robust tool for collaboration and planning. When it has the opportunity to play well with other apps, however, it can really shine. Our friends at Zapier have made that linking process easy by putting together the definitive guide for integrating Pivotal Tracker with a variety of useful apps to create an even more powerful ecosystem.
Read on to learn how to integrate Tracker with the following apps and services:
To link any of your third-party accounts with Pivotal Tracker, you will need an active Pivotal Tracker account, and an active project. To get started with Pivotal Tracker, including information on how to create a new project, you can start here. You can learn more about getting started with Pivotal Tracker on Zapier here.
You will need:
Steps:
To connect your Asana account to Zapier, you need an active Asana account. To learn about getting started with Asana, start here. For more information on using Asana with Zapier, you can go here.
Click the link to use the Send Asana tasks to Pivotal Tracker to create new stories shared Zap.
Step 1. Choose your Asana account from the list of accounts, or connect a new account.
Step 2. Choose your Pivotal Tracker account from the list of accounts, or create a new account.
Step 3. Select the Pivotal Tracker story that you would like to use from the Project ID drop-down menu and the Name that the Story will be created as.
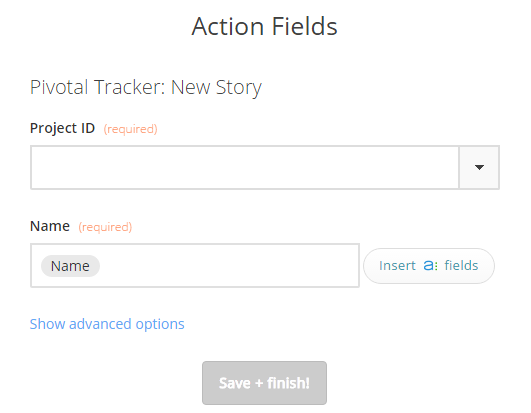
Step 4. Click Save + finish.
Now test the Zap to make sure it works. Once you’re satisfied with the results, your new Asana tasks will be added to Pivotal Tracker as new stories.
Note: If you ever want to change this Asana and Pivotal Tracker integration, just go to your Zapier dashboard and tweak anything you’d like.
You can also check out all that’s possible with Asana on Zapier, and other ways to connect Asana and Pivotal Tracker.
You will need:
Steps:
To link your Pivotal Tracker account to Asana, you will need an active Asana account. To learn about getting started with your Asana account, start here. For more information on using Asana with Zapier, you can go here.
Click the link to use the Push Pivotal Tracker stories to create new Asana tasks shared Zap.
Step 1. Choose your Pivotal Tracker account from the list of accounts, or connect a new account.
Step 2. Select the Pivotal Tracker story that you would like to use from the Project ID drop-down menu and click Save + continue.

Step 3. Choose your Asana account from the list of accounts, or connect a new account.
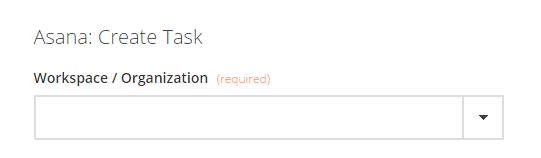
Step 4. Choose the Workspace/Organization in which the Asana task will be created.
Step 5. Click Save + finish.
Now test the Zap to make sure it works. Once you’re satisfied with the results, new stories in Pivotal Tracker will automatically create corresponding tasks in Asana.
Note: If you ever want to change this Pivotal Tracker and Asana integration, just go to your Zapier dashboard and tweak anything you’d like.
You can also check out all that’s possible with Pivotal Tracker on Zapier, and other ways to connect Pivotal Tracker and Asana.
You will need:
Steps:
To connect your GitHub account to Zapier, you will need an active GitHub account, and an active repository. To get started on how to set up Git, including information on creating repositories, start here. For information on getting started with GitHub on Zapier, go here.
Click the link to use the Add new GitHub issues to Pivotal Tracker as new stories shared Zap.
Step 1. Choose your GitHub account from the list of accounts, or connect a new account.
Step 2. To connect a new GitHub account to your Zapier, you will need to follow the prompts in the pop-up window, and click Authorize application.

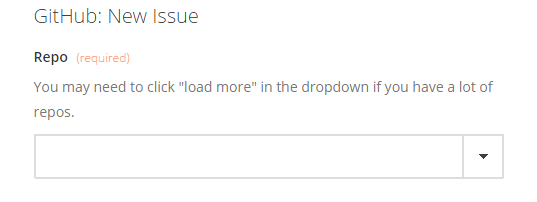
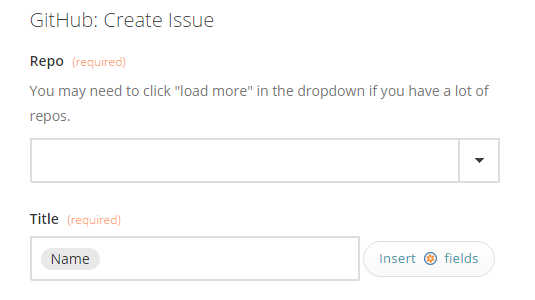
Step 3. Choose a Repository to use from the drop-down menu. Select Save + continue.
Step 4. Choose your Pivotal Tracker account from the list of accounts, or connect a new account.
Step 5. Select the Pivotal Tracker Story that you would like to use from the Project ID drop-down menu and the Name that the Story will be created as.
Step 6. Click Save + finish.
Now test the Zap to make sure it works. Once you’re satisfied with the results, new GitHub issues will be added to Pivotal Tracker as new Stories.
Note: If you ever want to change this GitHub and Pivotal Tracker integration, just go to your Zapier dashboard and tweak anything you’d like.
You can also check out all that’s possible with GitHub on Zapier, and other ways to connect GitHub and Pivotal Tracker.
You will need:
Steps:
To link your Pivotal Tracker account to GitHub, you will need an active GitHub account, and an active repository. To get started on how to set up Git, including information on creating repositories, start here. For information on getting started with GitHub on Zapier, go here.
Click the link to use the Add new Pivotal Tracker stories to GitHub as new issues shared Zap.
Step 1. Choose your Pivotal Tracker account from the list of accounts, or connect a new account.
Step 2. Select the Pivotal Tracker story that you would like to use from the Project ID drop-down menu and click Save + continue.
Step 3. Choose your GitHub account from the list of accounts, or connect a new account.
Step 4. To connect a new GitHub account to your Zapier, you will need to follow the prompts in the pop-up window, and click Authorize application.
Step 5. Choose a Repository to use from the drop-down. Choose a Pivotal Tracker field to use as your Title.
Step 6. Click Save + finish.
Now test the Zap to make sure it works. Once you’re satisfied with the results, new Pivotal Tracker stories will be automatically sent to GitHub as new issues.
Note: If you ever want to change this Pivotal Tracker and GitHub integration, just go to your Zapier dashboard and tweak anything you’d like.
You can also check out all that’s possible with Pivotal Tracker on Zapier, and other ways to connect Pivotal Tracker and GitHub.
You will need:
Steps:
To link your Pivotal Tracker stories to Harvest, make sure you have created a project entry on Harvest. You can learn more about getting started with Harvest on Zapier here.
Note: Harvest requires at least a Client name, Project name, and a Project timeframe to create a project.
Click the link to use the Add new Pivotal Tracker Stories to Harvest as Tasks shared Zap.
Step 1. Choose your Pivotal Tracker account from the list of accounts, or connect a new account.
Step 2. Select the Pivotal Tracker story that you would like to use from the Project ID drop-down menu and click Save + continue.
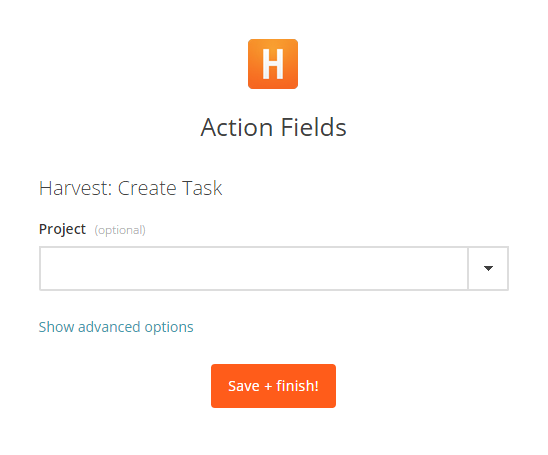
Step 3. Choose a Harvest account, or connect a new account. *Optional: You may wish to select a Project to assign the task you are about to create to. To do so, simply select the project in the optional drop-down menu on the Create Task screen.
Step 4. Click Save + finish.
Now test the Zap to make sure it works. Once you’re satisfied with the results, your new Pivotal Tracker stories will create tasks in Harvest.
Note: If you ever want to change this Harvest and Pivotal Tracker integration, just go to your Zapier dashboard and tweak anything you’d like.
You can also check out all that’s possible with Pivotal Tracker on Zapier, and other ways to connect Pivotal Tracker and Harvest.
You will need:
Steps:
To link your Pivotal Tracker to Toggl, you will need an active Toggl account. To learn more about getting started with Toggl, check here.
Click the link to use the Turn Pivotal Tracker stories into new Toggl tasks shared Zap.
Step 1. Choose your Pivotal Tracker account from the list of accounts, or connect a new account.
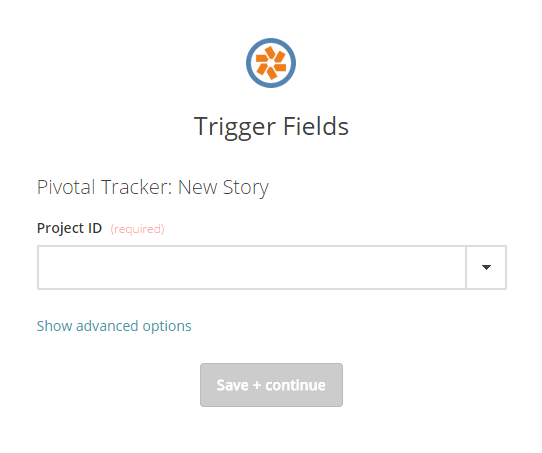
Step 2. Select the Pivotal Tracker story that you would like to use from the Project ID drop-down menu and click Save + continue.
Step 3. Choose your Toggl account from the list of accounts, or connect a new account.
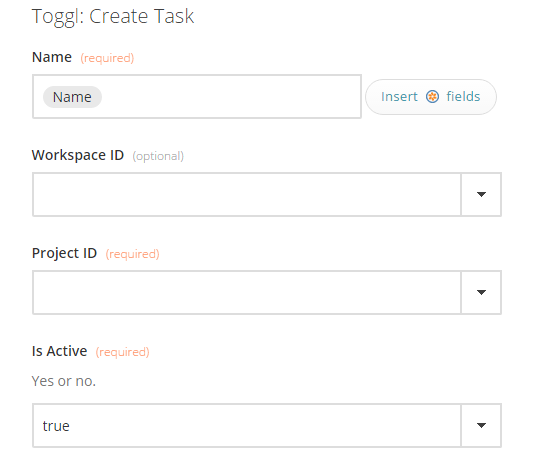
Step 4. The Zap will default to designating the Name field from Pivotal Tracker as the Task name. You will need to select the Workspace ID, the Project ID, and whether or not the project Is Active.
Step 5. Click Save + finish.
Now test the Zap to make sure it works. Once you’re satisfied with the results, your new Pivotal Tracker stories will create corresponding Toggl tasks.
Note: If you ever want to change this Pivotal Tracker and Toggl integration, just go to your Zapier dashboard and tweak anything you’d like.
You can also check out all that’s possible with Pivotal Tracker on Zapier, and other ways to connect Pivotal Tracker and Toggl.
You will need:
Steps:
To use your Zapiermail.com integration, you need only your Zapier account and to set up the interaction. For information on getting started with this integration, start here.
Click the link to use the Add new inbound emails to Pivotal Tracker as stories shared Zap.
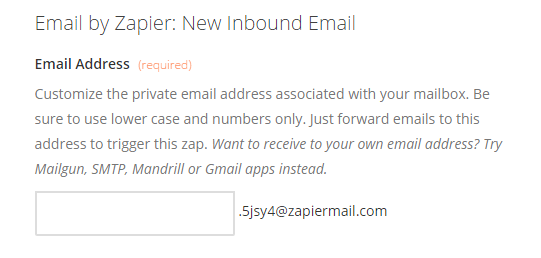
Step 1. Follow the directions on the Zap to create your inbound Zapiermail.com mailbox.
Step 2. Choose your Pivotal Tracker account from the list of accounts, or connect a new account.
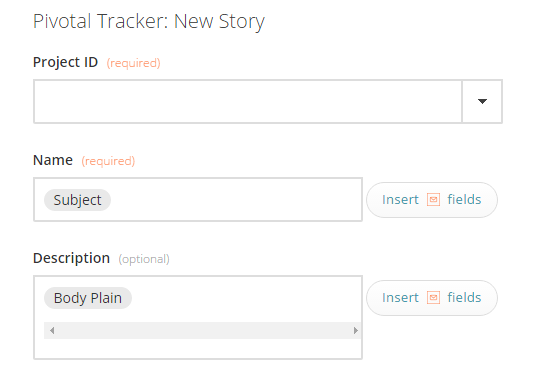
Step 3. Select the Pivotal Tracker story that you would like to use from the Project ID drop-down menu. If you wish to change the default fields of the Zap for Name and Description, do so on this screen.
Step 4. Click Save + finish.
Now test the Zap to make sure it works. Once you’re satisfied with the results, new stories will automatically be created from inbound email to your zapiermail.com address.
Note: If you ever want to change this Email by Zapier and Pivotal Tracker integration, just go to your Zapier dashboard and tweak anything you’d like.
You can also check out all that’s possible with Email by Zapier on Zapier, and other ways to connect Email by Zapier and Pivotal Tracker.
You will need:
Steps:
To link your Trello account to Pivotal Tracker, you will need an active Trello account. To learn about getting started with with Trello, look here. For more information on using Trello with Zapier, you can go here.
Click the link to use the Turn new Pivotal Tracker stories into Trello cards shared Zap.
Step 1. Choose your Pivotal Tracker account from the list of accounts, or connect a new account.
Step 2. Select the Pivotal Tracker story that you would like to use from the Project ID drop-down menu and click Save + continue.

Step 3. Choose your Trello account from the list of accounts, or connect a new account.
Step 4. Choose a Board and a List option from the drop-down menus. If you wish to change the Name or Description field from the default, you can choose to do that as well.
Step 5. Click Save + finish.
Now test the Zap to make sure it works. Once you’re satisfied with the results, new Pivotal Tracker stories will automatically be created as corresponding Trello cards.
Note: If you ever want to change this Pivotal Tracker and Trello integration, just go to your Zapier dashboard and tweak anything you’d like.
You can also check out all that’s possible with Pivotal Tracker on Zapier, and other ways to connect Pivotal Tracker and Trello.
You will need:
Steps:
To connect your Trello account to Zapier, you need an active Trello account. To learn about getting started with with Trello, look here. For more information on using Trello with Zapier, you can go here.
Click the link to use the Create new Pivotal Tracker stories from Trello cards shared Zap.
Step 1. Choose your Trello account from the list of accounts, or connect a new account.
Step 2. Choose your Pivotal Tracker account from the list of accounts, or connect a new account.
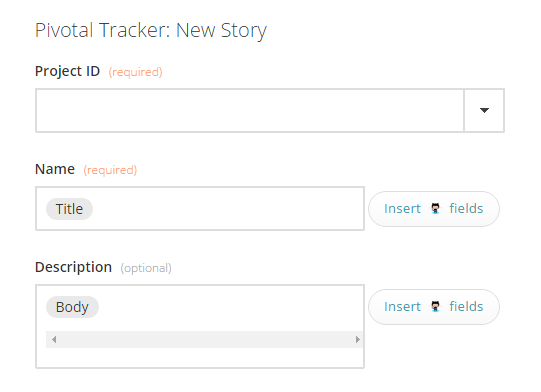
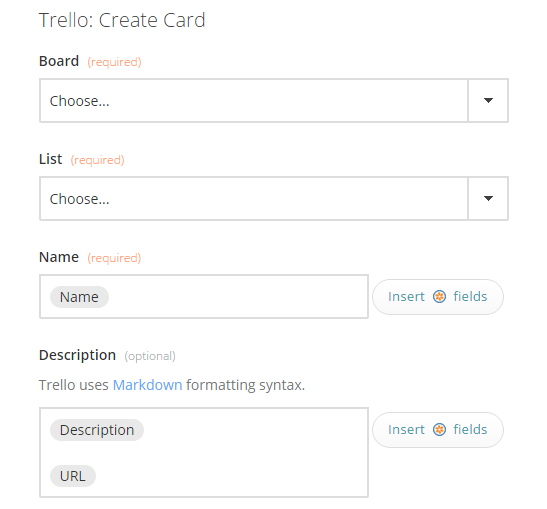
Step 3. Select the Pivotal Tracker story that you would like to use from the Project ID drop-down menu. If you wish to change the Name or Description field from the default, you can choose to do that as well.
![]()
Step 4. Click Save + finish.
Now test the Zap to make sure it works. Once you’re satisfied with the results, your new Trello cards will create corresponding stories in Pivotal Tracker.
Note: If you ever want to change this Trello and Pivotal Tracker integration, just go to your Zapier dashboard and tweak anything you’d like.
You can also check out all that’s possible with Trello on Zapier, and other ways to connect Trello and Pivotal Tracker.
With all these options, we’re sure you’ll fine new and creative ways to make Pivotal Tracker do more for you. If you run into any issues, or have any questions, please feel free to email us.
Category: Integrations Productivity
Tags: How to